Introduction
Have you ever wondered how to reproduce a bug in your Android Application / SDK in the exact same environment that the client experienced it and still be able to trace the product’s activities without having access to the debuggable/staging version of your product?
If you have, then keep on reading…
Android is an open source and versatile operating system, available to a wide range of devices.
This approach for an operating system forces you to prepare for every situation. Whether it is “low memory” exceptions caused by insufficient resources or missing system services, you need to be able to debug edge cases that your lab test cannot evaluate.
When developing SDKs for general usage by any application, you are often faced with the problem of debugging production issues in the uncharted territory of an app.
Applications today often go through different obfuscation processes, as well as not being marked as “debuggable”, since these applications are in their release version.
So, trying to retrieve log data and debugging non-debuggable applications while lacking the source code makes using common debuggers, like the ones provided in Android Studio, irrelevant.
To maintain full visibility when fixing bugs and make sure our SDKs work with any application and through any reported problems, we need to perform both static and dynamic analysis of those apps.
I will now go through the steps we carry out when performing basic dynamic analysis.
* All files in this tutorial are available in the repository.
Contents:
- Common obstacles & Frida
- Setting up the environment
- Creating our first Frida wrapper
- Creating our monitoring script
- Real life demonstration

Common obstacles when debugging an SDK (inside app)
- Obfuscation – Causes the code to be a lot less readable and traceable
- Source Code – No access to the original code
- Debuggable – Application is not marked as “debuggable” therefore it cannot be debugged using standard tools like Android Studio
- Logging – Disabling of logging systems (usually in the obfuscation process), leaving only very limited and carefully selected output from the SDK
- Anti-Hooking – The third party developers might have implemented different methods to avoid dynamic analysis of the app
Dynamic analysis of an Android application using Frida
Frida is a fairly new open-source tool described as a, “Dynamic instrumentation toolkit for developers, reverse-engineers, and security researchers.”
It provides a set of tools to perform dynamic analysis of software on multiple platforms without having to dive deep into reverse engineering concepts and methods that are complicated and require lots of training.
We will use Frida to perform “hooking” – the act of attaching to a software’s function and taking a look at the provided arguments, result and, if necessary, altering its functionality.
By doing that, we will be able to get a trace of executed functions in our application to ensure that it is working appropriately.
First, we will setup the environment:
Our programming language of choice here will be Python because it is agile, quick to deploy and familiar.
Assuming you already have a Python environment and the Android SDK bundle installed, we are ready to install Frida using Python’s pip:
pip install frida-tools
Setup and running Frida-server on our Android device
Get a rooted device and find out what kind of CPU architecture it is running:
adb shell getprop ro.product.cpu.abi will return a response with something like the following:

armeabi-v7a(arm 32bit)
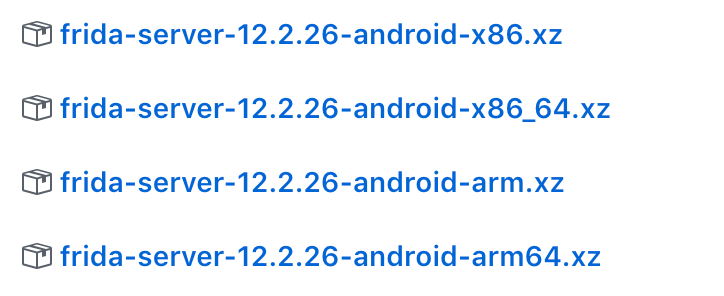
- Download frida-server for the appropriate device from their release page.
To start the server do the following:
Push the downloaded frida-server file to the device:
adb push <frida-server-file> /tmp/local/tmp/frida-server
CD to the directory we push the file to:
adb shell

cd /tmp/local/tmp
Change permission to execute:
chmod 755 frida-server
Run in background:
./frida-server &
Creating our first Frida wrapper
Now, we will create a basic Python script to attach to a ROOTED Android device connected to our computer:
If the following script succeeds, then we are attached to an application process with the package name provided as the first parameter. We have injected
frida_code, which is a variable containing the Javascript instruction we want Frida to perform on the process.
Creating our monitoring script
From this point, we will be working on our javascript code that will contain instructions for the Frida server on how to manipulate the attached process.
Every action we run on the Java class needs to be encapsulated inside Java.perform:
The Java context class is a built-in Frida class that we use to interact with the Java classes that were loaded in runtime.
Java.perform(function() { // Code to perform });
All loaded classes are held in a dictionary inside Java so, when looking for a specific class, we do the following:
const cls = Java.use(<full_class_name>);
We retrieve a pointer to that class (e.g. – “com.company.app.NetworkManager”)
Once we have the class, we want to get all of the overloads of a specific method.
The overloads are every implementation the method has. In Java, you can use polymorphism so that one method might receive a different type and number of arguments.
var method_overload = cls[<func_name>].overloads[index];
We retrieve one of the overloads of that method
(e.g. – “void updateUser(int score)”, “void updateUser(String specificUserId, int score)”, etc.).
overloads[i].argumentTypes
Contains a list of objects describing each argument this overload receives (use method_overload.argumentTypes[j].className to get the type a specific argument).
overloads[i].implementation = function() { … }
This part is where we replace the method’s implementation with our own. The implementation property is a Javascript function that receives the overload’s arguments and returns a result.
The function monitoring javascript:
The class monitoring Javascript:
Object.getOwnPropertyNames(cls.$classWrapper.prototype); – This code will return the properties of the class object’s “classWrapper”, which are the methods and members of that specific class (cls).
These two functions will be used for hooking a single method of a class or all of the class’s methods.
The last part is the execution part. Insert this code into your Frida script and everything inside the function you passed to Java.perform will be executed:
If you have reached this point you should be able to create a basic monitoring platform for your applications, so try it out on the application of your choice.
The full code can be found in this repository.
About the author:
Yair Pecherer is Mobile FullStack Developer in the Data Collection Group at SimilarWeb.
He is passionate about Mobile Development, especially Android and Mobile Cyber Security.